With a newly installed Windows PC, only a few system services and programs start. The resource requirements are correspondingly low and the operating system responds quickly.
This changes over time, which is mainly due to the additional software installed. Programs and services that start automatically after Windows logon lead to delays. The startup time of the system increases and it takes longer and longer for the desktop to respond to mouse clicks or for a program to start.
How noticeable the system slowdowns are depends on the overall performance of the computer and the performance of the hard drive or SSD.
As a general rule, a program that is only installed but does not start automatically cannot slow down Windows. However, this only applies if there is enough space available for temporary files or downloading updates, for example.
To avoid mistakes, you should therefore never fill drives close to their capacity limit. With both hard drives and SSDs, too little free space also affects speed for other reasons (see box “Making the most of hard drives and SSDs”).
Further reading: Make Windows 11 better: How to customize and expand the Start menu
As in real life, tidying up is also a regular task in Windows. Removing superfluous files ensures that there is always enough free space on the drive. You should also remove unused programs, move particularly large files from the SSD to an existing hard drive and deactivate autostart if it is not required.
get windows 11 pro for cheap
Windows 11 Pro
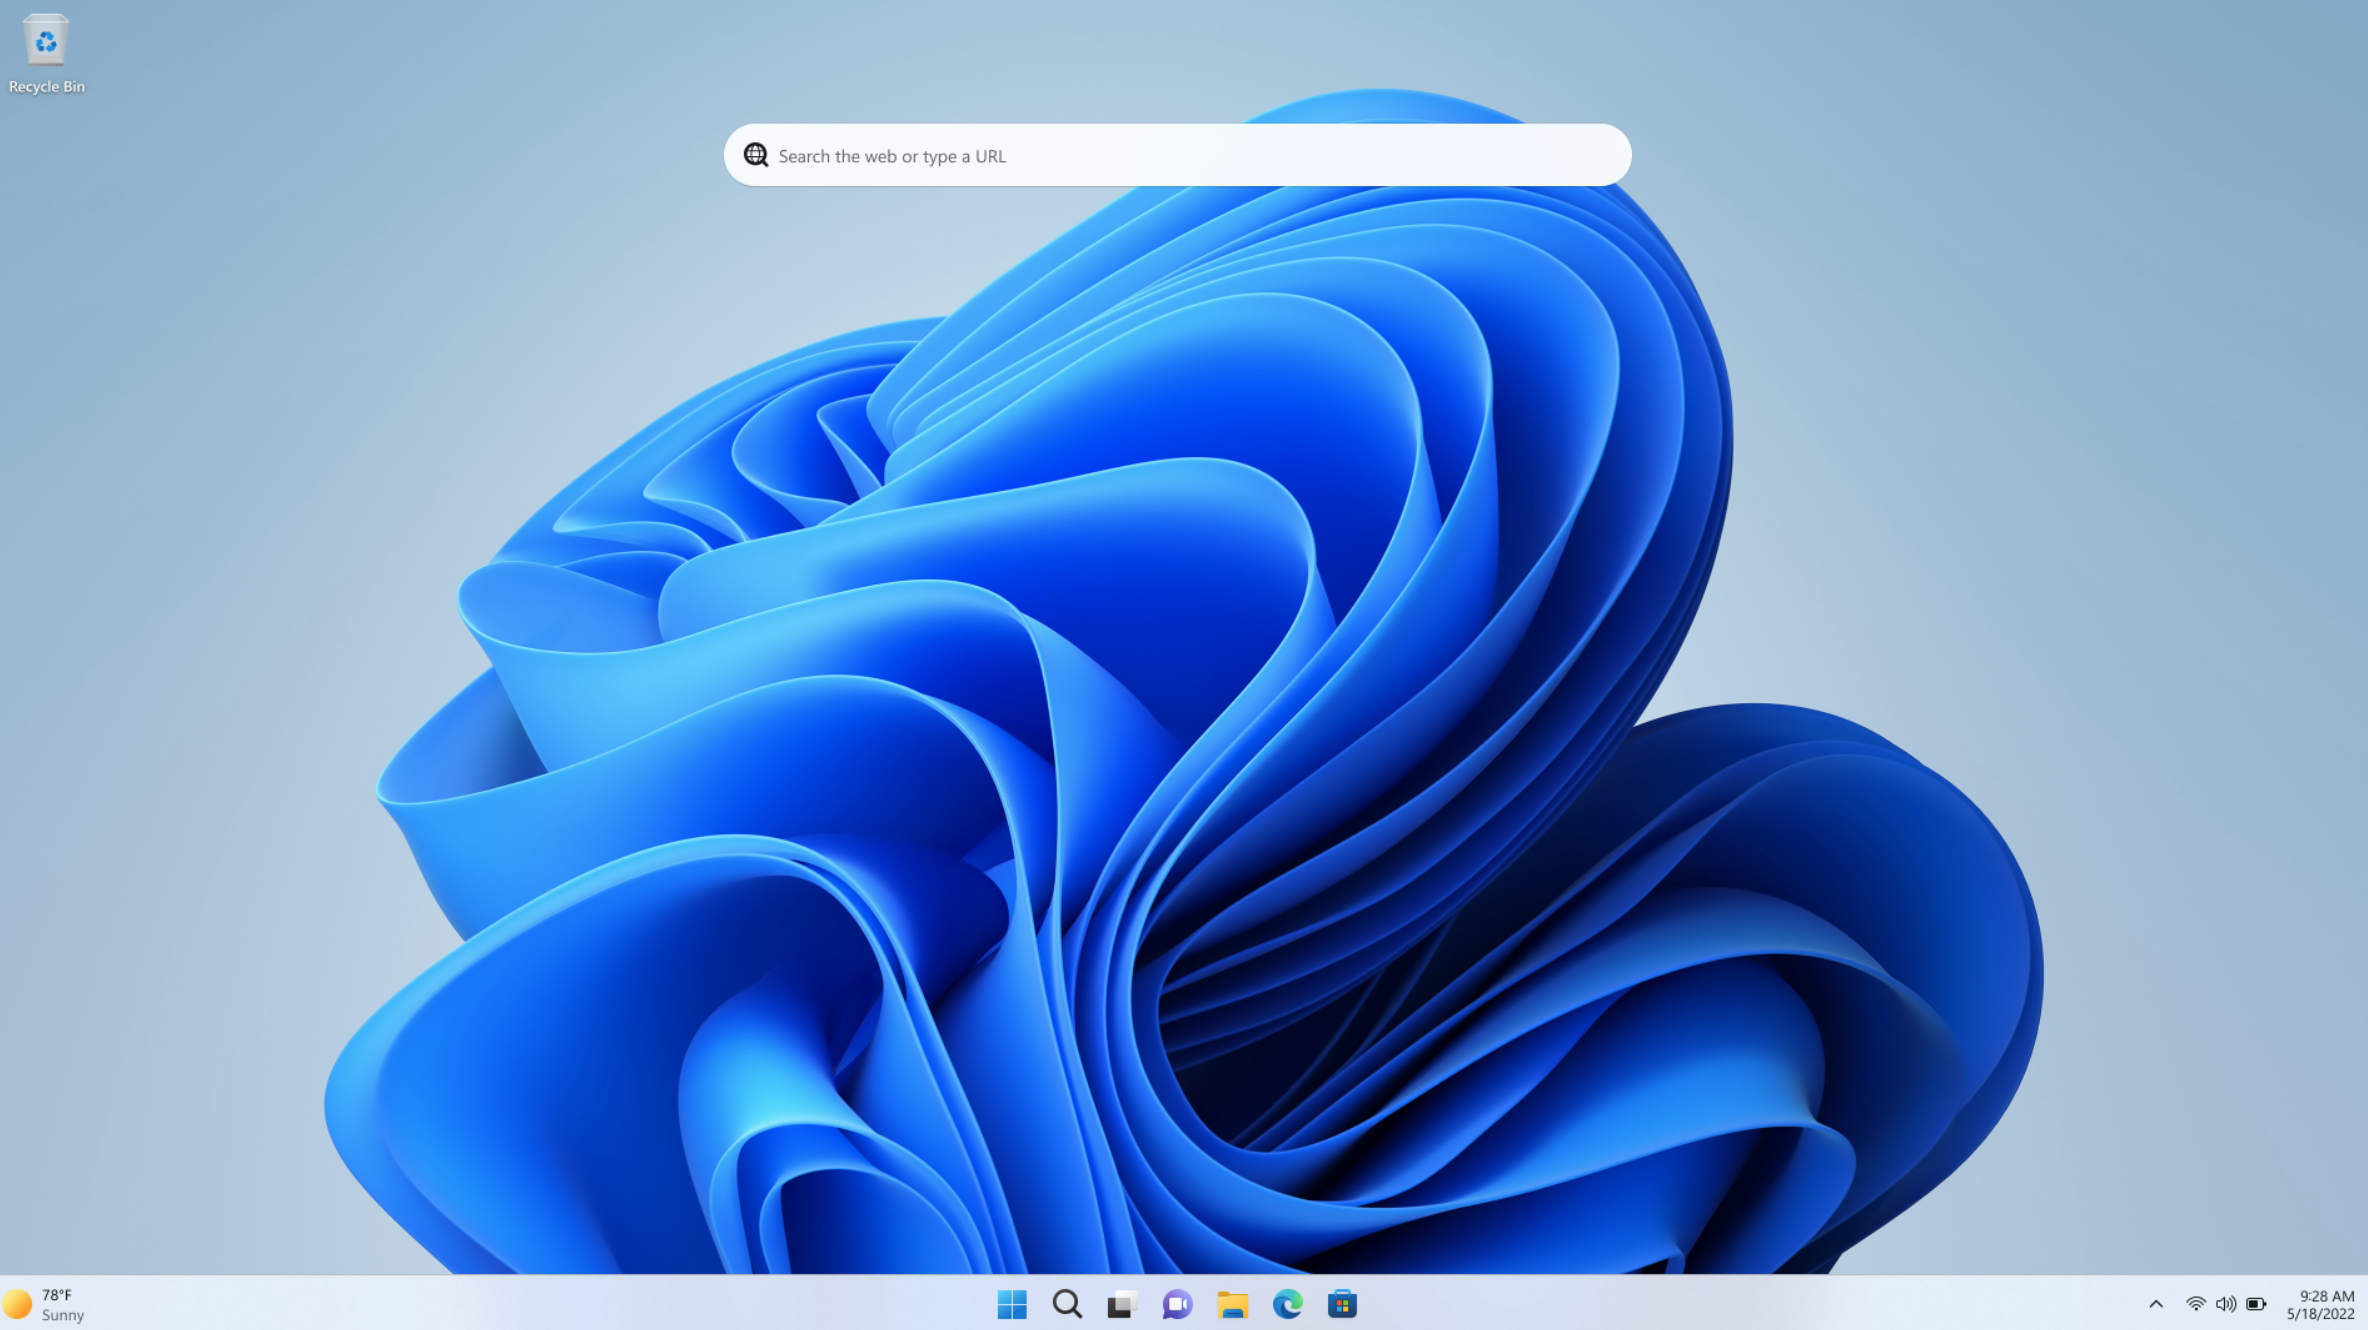
The Windows on-board tools can provide valuable services here, while additional tools offer more and advanced functions.
However, there is no simple one-click solution. Ultimately, the tools can only collect what you can possibly delete. After that, the responsibility lies with you. In this article, we provide decision-making aids and show you where you should be careful and what you should not delete.
Note: The tips in this article apply to Windows 11, but some of the functions are also available in Windows 10.
1. Check memory utilization
Call up Settings — for example, with the key combination Win+I or a search in the Start menu. Go to System > Memory. You will see an informative overview with the total utilization of the system drive as well as the storage space used by temporary files and installed apps.
Under Other, Windows displays the space occupied by files that cannot be specified in more detail. Clicking on Show more categories takes you to a list of other areas, such as Documents, Pictures and Videos. You can see how much storage space is occupied in each case.
Clicking on one of the categories shows detailed information:
- Other shows some of the largest folders on the drive. You can open the folders by clicking on them in Windows Explorer and then decide whether something can be deleted.
- Installed apps leads to Apps > Installed apps. The view can be sorted by size or installation date. You can use the three-dot menu to uninstall programs that you no longer need.
- Temporary files shows a list of areas in which files that may no longer be required are stored. After a Windows upgrade, Previous Windows installation(s) appears in the list. This is the folder C:\Windows.old. You can remove this if everything is running smoothly and you no longer want to return to the previous Windows installation. Windows automatically deletes the folder after about a month.
Under System > Storage > Temporary files there is a tick in front of all entries that you can delete without hesitation. To do this, click on Remove files. You can also tick the boxes in front of Downloads and Recycle bin.
But be careful: Downloads relates to your personal download folder. If you do not want to lose the downloaded files, do not tick this box. For Recycle Bin, you should make sure that there are no unintentionally deleted files in the recycle bin. Open the recycle bin by double-clicking on the desktop icon and check the contents.
Only delete if necessary: You can delete everything under Temporary files, but this is not useful in every case. The “thumbnails,” for example, are preview images that Windows saves in db files in the folder C:\Users[username]\AppData\Local\Microsoft\Windows\Explorer.
This allows Windows Explorer to load the preview images more quickly. After some time, the db files also contain preview images whose originals have long since been deleted. Regular cleaning therefore seems advisable.
On the other hand, the files do not usually take up much memory space and if you delete everything, Windows Explorer has to rebuild the cache of the preview images. Although this does not take long, it is unnecessary.
Further reading: 9 tweaks that turn off your Windows PC’s most annoying ads
The situation is similar with temporary internet files. Microsoft’s Edge web browser saves the elements of web pages in a cache, allowing it to display them more quickly. If the temporary internet files are deleted, it will take longer to load pages on regularly visited websites.
As a rule, the Edge cache does not occupy more than 1GB, which means that not much storage space can be freed up. Other web browsers use their own cache, which can be emptied in the respective programs (see point 7).
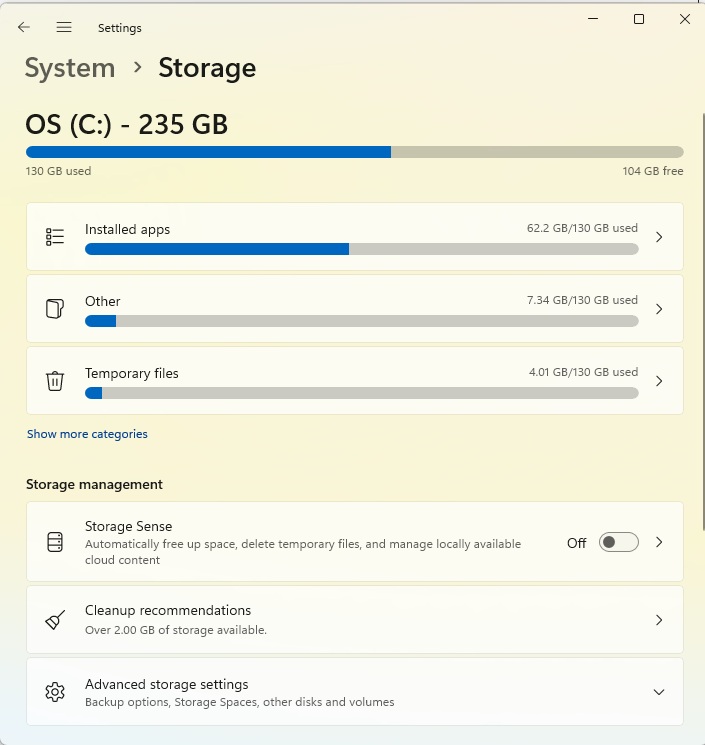
Storage overview: In the Settings under System > Storage you can find out how the hard drive is used. Click on the categories for further details.
Foundry
2. Windows 11 cleanup functions
In Windows 11, go to System > Storage in Settings and click on Cleanup recommendations. You will see the storage space occupied by downloads and the recycle bin as well as Previous Windows installation(s), if still available.
Tick the areas in which you want to delete files and click on the [X] GB cleanup button. However, this will not only delete the selected files, but also other temporary files. Click on Advanced options to find out about the effects.
The settings correspond to those under System > Storage > Temporary files, but the current selection is added, for example Recycle bin. If you consider it necessary, you can remove the tick from some areas before cleaning.
The list you get after clicking on Large or unused files is more interesting. You will see particularly large files and files used a long time ago that you may be able to delete. The list under Unused apps can also be helpful. However, only programs that you have installed via the Microsoft Store are displayed.
An alternative for Windows 10 and 11 is Iobit Uninstaller.
Under Programs, go to Rarely used to display the applications that are rarely used. The list can serve as a guide, but is usually not complete and sometimes shows inaccurate dates. However, it is not possible to do better than this because Windows does not reliably log the start time of a program.
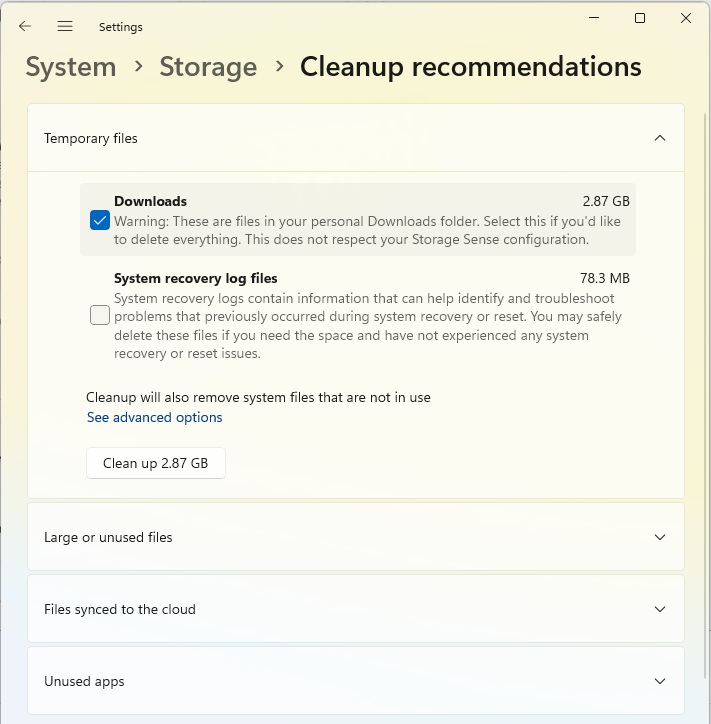
What can be deleted? The “cleanup recommendations” point to obvious areas such as the recycle bin. However, you can also have large files and unused apps listed.
Foundry
3. Free up storage space
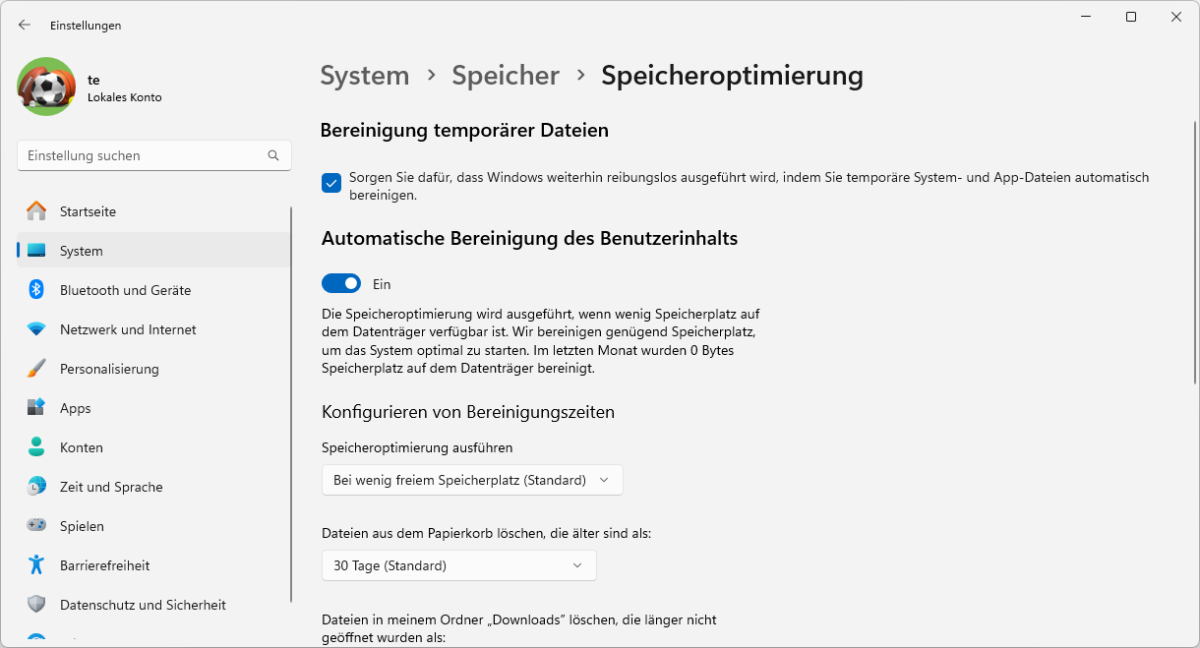
If you don’t want to do all the tidying up yourself, you can leave the task to Windows. In the Settings, go to System > Storage and set the switch behind Storage Sense to On.
The service can be configured by clicking on Storage Sense. A tick is already placed in front of Keep Windows running smoothly by automatically cleaning up temporary system and app files.
Automatic user content cleanup is also switched on, but is only activated when required due to the default setting During low free disk space (default). However, you can also set a schedule for the clean-up with Daily, Every week, or Every month.
An interval can be specified under Delete files from recycle bin if they have been there for over:. The default setting is 30 days. If you are worried that there may still be files in the recycle bin after 30 days that you would like to restore, it is better to set Never and empty the recycle bin manually.
The same applies to the setting for the download folder, where the default setting is Never. Only if you are sure that this folder will never contain files that you still need should you set it to 30 days or 60 days, for example.
Users of the Microsoft cloud storage Onedrive will find a useful setting under Locally available cloud content. With the default setting of 30 days, Onedrive automatically changes the status of the files in the synchronized folder to Available online if they have not been opened within this period.
This means that the files no longer take up any space on the drive. If you open one of these files afterwards, it will be available on the device again. Files that you have marked as Always keep on this device are not affected by this setting. If you do not want Onedrive to change the status of the files, set Never.
Connectez-vous pour ajouter un commentaire
Autres messages de ce groupe

TL;DR: Learn how to use AI to simplify your job with



Fans of physical media—myself included—tend to be a morbid bunch, dwe

Getting a graphics card in and out of a motherboard can be a hassle,
Microsoft is finally testing a way for you to quickly see how much ba

Plex is the middle of a full-on makeover, starting two months ago wit
