Portable apps are applications and tools that can be started directly upon clicking them, with no prior installation needed.
The advantage of this is that the programs are immediately ready for use and can be started from any storage drive — including a USB flash drive. These useful tools are then available for analyzing and maintaining any computer you slap the flash drive into, making them utterly invaluable for informal tech support duties.
Let’s take a look at the best portable applications for hardware analysis and system tuning, as well as a basic setup with media player, image editing, and word processing tools.
Further reading: How to permanently erase data on SSDs, hard drives, & USB flash drives
Set up and use the PortableApps.com platform
As a starting point for most portable applications, the PortableApp.com Platform is used to manage the programs and as a convenient program launcher.
The tool also checks whether updates are available, which can be installed with a single click.
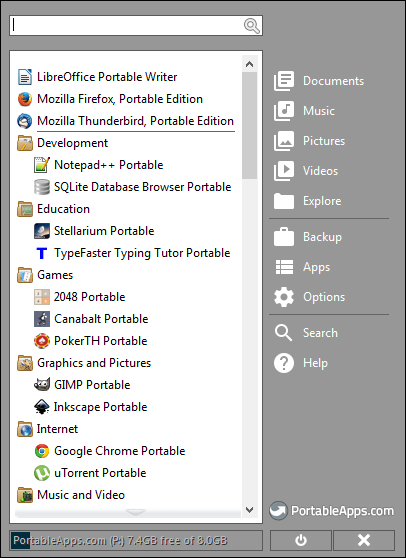
PortableApps.com Platform shows a menu with categories and programs. The portable applications can also be started from a USB stick.
PortableApps.com
Unzip the portable app package to any directory on the hard drive or directly to a USB stick. You can specify the root directory or a subdirectory as the destination. The “PortableApps” folder contains the programs; you can use the “Documents” folder for your own files.
Launcher: Start PortableApps.com Platform via “Start.exe.” The program interface opens with the application menu. When you start a program or click with the mouse on the desktop, the window closes automatically.
The tool appears as a button in the taskbar and as an icon in the notification area next to the clock. The programs are sorted into categories such as “Graphics and Pictures,” “Hardware,” “Security,” and “System,” and can be started with a click of the mouse.
The search bar serves as a filter; only menu entries that match the pattern entered are displayed.
Configuration: PortableApps.com Platform can be configured by clicking on “Options.” On the “Organization” tab, you can define the structure of the application list. For example, select “Show all alphabetically” if you want to see the list of all programs but no categories.
Under “Advanced,” “Keep menu open after application start” can be a useful option.
If activated, the menu remains open after you have started a program. This allows you to try out several programs without having to call up the menu again each time. Click on “OK” to save the settings.
Installing programs: Go to “Applications > More applications > By category.” A window opens with a list of additional programs that can be downloaded. Tick the desired entries and click on “Install.”
Remove programs: If you do not need a program, simply delete it from the “PortableApps” folder.
Add programs manually: You can also create folders with additional portable tools. PortableApps.com Platform searches for executable files in all subdirectories at startup and displays new programs in the “Other” category. A program can be assigned to another category via the “Category” context menu item.
Further reading: How long does data last on a USB flash drive?
Tools for Windows tuning and system maintenance
Many Windows settings are hidden in the depths of the system or cannot be changed at all by default.
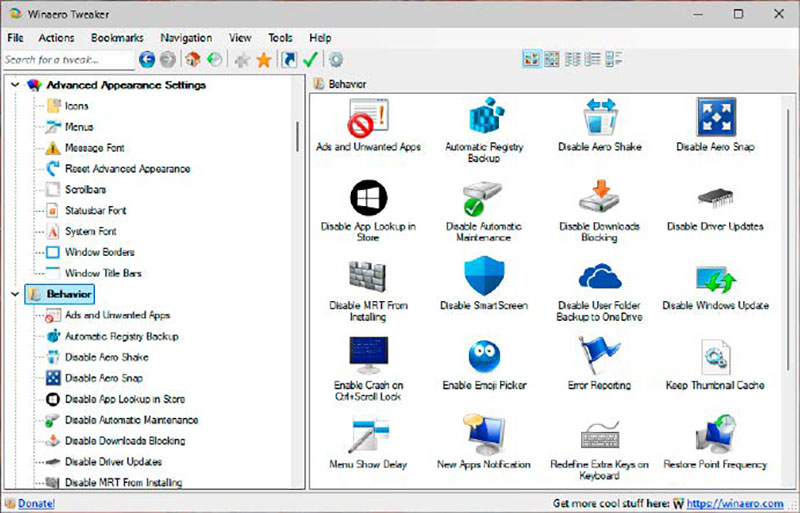
Winaero Tweaker: The tool provides quick access to Windows options and settings, which it usually changes directly in the registry.
IDG
Winaero Tweaker provides access to numerous options and settings.
The “tweaks” are listed in a tree view. The tool determines the version of the operating system and only displays the settings available for it. The description texts are usually brief; if you want to know more, click on “See more details how this tweak works” (or similar). The website then shows further information.
Tweak Power offers an interface for a number of system tasks.
Under “Cleaning” you can remove traces of web browser use. The “Windows” section provides quick access to many Windows settings — for example, in the areas of “Operation” (mouse, keyboard), “Administration” (user logon, system startup), and “Visual Styler” (system icons, screen saver).
Tweak Power also offers functions for managing autostart programs, and can fix errors in the file system and optimize system settings.
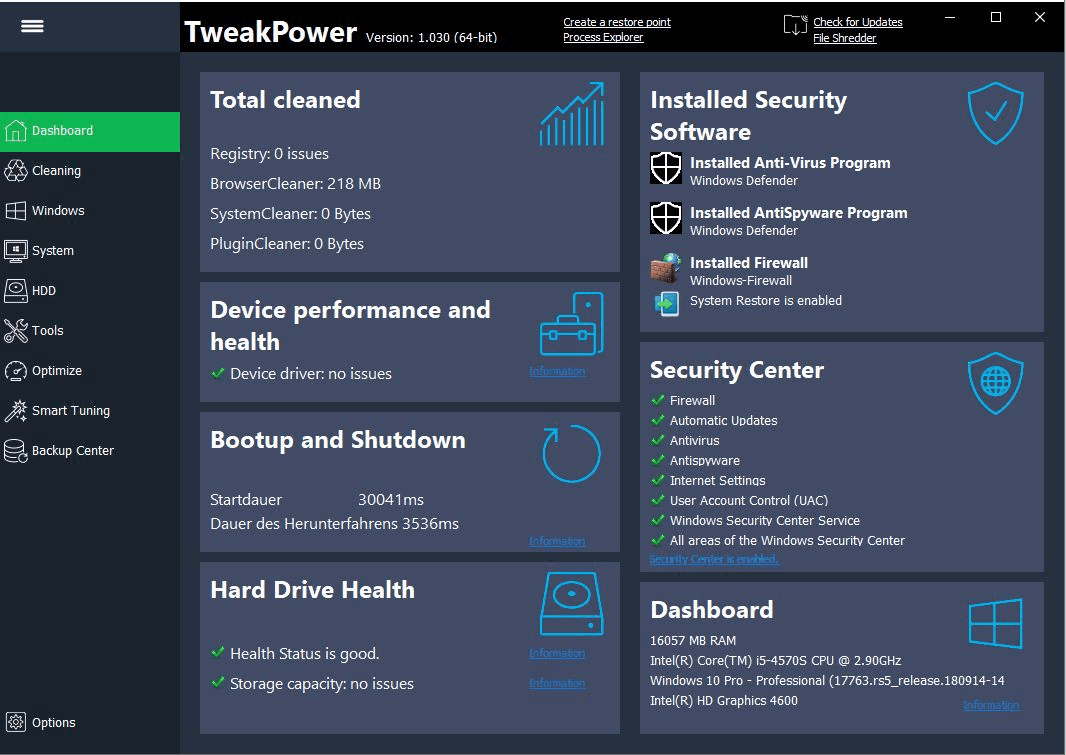
Tweak Power
Tweaking.com Windows Repair AIO can fix numerous Windows problems, such as resetting incorrectly set file permissions, re-registering system files, or repairing the Windows update.
Windows Repair recommends carrying out all repairs in safe mode. To do this, click on “Restart in safe mode.”
As soon as Windows is running again, restart Windows Repair. First carry out the steps recommended by the wizard. Under “System tools,” create a backup of the registry before making any changes to the system. Then click on “Repairs > Main part” and “Call up repairs.” Select the desired repair functions.
Hardware analysis and inventory
Information about what is in the PC helps, for example, when searching for drivers. However, it is also advisable to keep an eye on the condition of the drives and the temperature of the components in order to prevent failures.
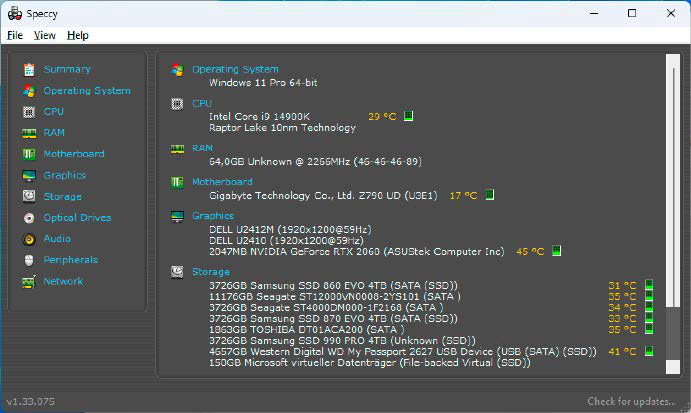
Speccy: Find out what hardware is installed in the PC and display the temperatures of the motherboard, CPU, graphics chip, hard drives and SSDs.
IDG
Speccy quickly provides the most important data on CPU, RAM, graphics chip and motherboard. It shows the manufacturer and type designations of the components as well as the temperature of the CPU and SSDs or hard drives. The S.MA.R.T values provide information on the status of the drives.
Hwinfo displays particularly extensive details about the hardware.
The “System overview” window provides data on the CPU, motherboard, and GPU, while the main window lists all components found. “Sensors” provides a more detailed insight into the current values of the CPU, RAM, drives, and network adapters — for example, the clock frequency, voltage supply, temperature, power consumption, and transfer rates.
CPU-Z, GPU-Z, SSD-Z, and PCI-Z specialize in the values of the processor, graphics chip, SSD, and PCI bus. Crystal Disk Info displays drives and the requested S.M.A.R.T. data.
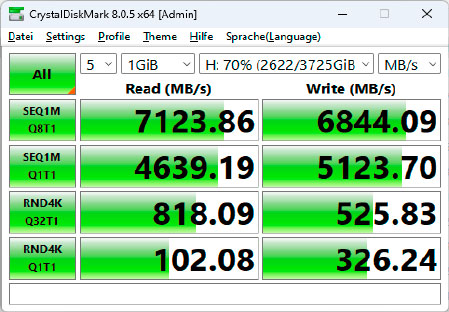
Crystal Disk Mark: The tool measures the read and write speed of hard disks and SSDs. You can find out whether a drive actually delivers the expected performance.
IDG
Crystal Disk Mark is a performance test for hard disks and SSDs. The tool can determine the transfer rate with different file sizes. This can be used to determine whether an SSD is working as fast as it should.
Using a USB stick for system installation
Windows or Linux systems can be set up quickly from a USB stick. Installation systems are usually delivered as an ISO file, the contents of which you must first transfer to a USB stick.
This works particularly reliably for a large number of systems with Rufus. If you start Rufus from a stick with the portable tool collection, you need a second USB stick as the installation target. The stick will be formatted and all files on it will be lost.
Autentifică-te pentru a adăuga comentarii
Alte posturi din acest grup

President Trump said Thursday that he plans to raise the tariff on im
Ages ago, coworkers asked why I covered my laptop’s webcam. Then they

Razer has teamed up with Microsoft’s Minecraft for a lineup

Market researcher IDC has lowered its forecasts for worldwide PC sale

The best type of security camera is one that can be installed in mere

Despite the trend in shrinking PC sizes, larger desktop towers with A
No doubt you use your mouse’s scroll wheel to scroll up and down in b
